Tuesday, December 31, 2013
Sunday, December 22, 2013
Sunday, November 3, 2013
Wednesday, September 4, 2013
Behind the scene Pacific Rim
Monday, September 2, 2013
Best 3D topology in youtube
if you learn a 3D topology for human.. i think this video is almost good on topology for newbie.. check this out
u can learn from sampad tutorial in youtube..
it;s the best free tutorial in youtuibe...
thanks sampad for sharing
u can learn from sampad tutorial in youtube..
it;s the best free tutorial in youtuibe...
thanks sampad for sharing
Saturday, August 31, 2013
Monday, August 26, 2013
Saturday, August 24, 2013
Coloring row of faces
Once you have created a row of faces that define the muscles. it's helpful to apply a different color to the row as a visual guide when modeling.
You can do this easily by using the ringSelect command assigned to your Marking Menu in the previous lesson
- select an edge defining a row of modeled faces
- Hold down Ctrl, then RMB-Click on the geometry to choose edge ring utilities ---> to Edge Ring
Doing so will select all the edges that are part of that same row of faces
- Convert the selection to faces by pressing Ctrl+F11
- apply a different colored shader to the row of faces.
Friday, August 23, 2013
Thursday, August 22, 2013
Tuesday, August 20, 2013
Monday, August 19, 2013
Increasing resolution
You can now begin increasing the resolution of the model in order to achieve the best definiton of the beast. Keep in mind that you should achieve as much detail as you can by using the fewest possible polygons or edge rings. This workflow does not use a lower resolution proxy to produce the high resolution model. By creating every edge manually, you have completecontrrol over the topology and polygon count of your mesh instead of getting the geometry to a ceertain resolution and then smoothing it.
the main tools used in this should be the Split Polygon tool and Split Edge Ring Tol
In order to prevent the Split Edge Ring tool from splitting up the entire model all at once and localizing your edits, you might want to turn off the auto complete option of the tool. This allows you to specify from which to which polygonal edges you want to split along. another workflow is to divide your model intosections such as the head, torso, arms, legs,hands and feet, in order to be able to really focus on the portion of the model that you are working on
Sunday, August 18, 2013
How to rotating an object's pivot in autodesk maya
Here i bring to you how to rotating an object's pivot , i got this from youtube... very easy tutorial
check this out
check this out
Saturday, August 17, 2013
Marking Menu Editor
Hotkeys allow you to assign a command per key and you might eventually completely fill the keyboard with custom commands. a solution for this is to open the Marking menu editor and create Marking Menus. This way, you can gather several of your custom commands under a single Marking Menu.
Marking menus can be accessed in two different ways. One is to assign the Marking Menu to a hotkey through the Hotkey editor. Which is what you will see here . The other way is to access the Marking menu through the Hotbox via spacebar
1. Marking Menu Editor
select windows ---> settings/prefereces -->marking menus.
2. Create a marking menu
- Click the create Marking Menu button.
Doing so will pop the create Marking menu window.
- enter a proper name in the menu name fields, such as ModelingMenu.
3. Populating the marking menu
in order to add items to your marking menu, you must add scripts to different boxes of the menu. to do so, you can either MMB-Click+drag scripts from shelves to the appropriate boxes or right-click on box and select Edit menu item.
4. test and save the marking menu.
to test your marking menu, click in the test area at the bottom of the window. Pnce you are satisfied with it , click the save and close buttons.
Friday, August 16, 2013
Thursday, August 15, 2013
Wednesday, August 14, 2013
Tuesday, August 13, 2013
Splitting polygons
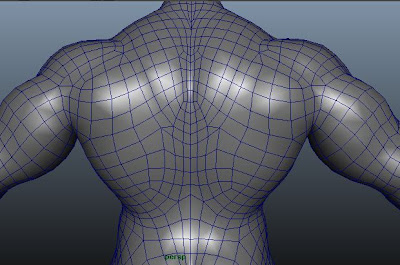
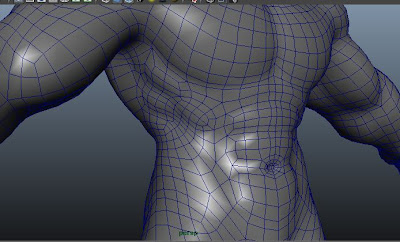
Modeling edge loops that flow with the muscles can be a time consuming process and there is no quick and easy way of achieving this.
when you first begin a model, you usually need to block all the important edge ring, up to the point where you can begin splitting edges to match muscle flow. you can then concentrate on creating important definition to the edge rings. at hits point, you don't need to bother keeping everything in quads. quads become important once the definition of the entire character is established.
Following are some example techniques that can be used to help create the muscle flow.
1. Guide curves
When your topology is flowing in different directions than what it should be, it can be difficult to break away from it. a recommended technique is to draw NURBS curves on the surface of the creature , which can serve as helpful guides when modeling according to your creature's muscle flow. These curves are then referred to as guide curves.
- Select the geometry for which you wish to create guide curves.
- Toggle on the Make live button located in the status Line or select Modify --> Make live
- Select Create ---> EP Curve Tool
- Draw directly on the surface to create a guide curve that follows the shape of the live geometry
- Assign the curves to a layer and then set a color override for that layer
- model the muscle flow of the geometry
Tuesday, August 6, 2013
Soft modification Tool
-->
Autodesk maya Tool
Soft Modification Tool
With the Soft modification tool, You can manipulate a group of vertices at the same time as a gradual fall-off from the deformer;s center. This tool gives you the feeling of really sculpting in 3D, and is very handy with high resolution models. the following is a short description of how to use this tool
1. Test geometry
- select Create -->polygon primitives-->plane
- scale the geometry as desired
2. Soft Modification Tool
You can use the soft modification tool in two simple ways.
- With the plane still selected click on the soft modification Tool icon in the Toolbar.
or
- With the planestill selected, go to the Animation menu set by pressing F2 and select Deform ---> Soft Modification
Once you use the tool, you should see the deformer's manipulator appear in the view panel on the plane.
Monday, July 29, 2013
Sunday, July 28, 2013
Saturday, July 27, 2013
Friday, July 26, 2013
Thursday, July 25, 2013
Monday, July 22, 2013
Subscribe to:
Comments
(
Atom
)


